
 Rooftop caps, which also known as rain caps, it provides protection that prevents water and debris getting into the chimney for exhaust vents and duct risers. It should be replaced whenever an aluminum or galvanized steel cap has been damaged by a falling object or is badly corroded. High winds, sleet, and plain old corrosion can cause a rain cap to break apart, rattle and leak water into your home.
Installing a replacement cap is as easy as climbing onto the roof. The job of replacing a rain cap requires a few hand tools, a reliable ladder and the ability to work on a roof. If you feel comfortable climbing up on your roof, you can replace the old one yourself for about $40. That’ll save about $150 in labor from an HVAC service company.
You can buy a new rain cap and a sheet metal crimping tool at any home center. Flues are usually 5 or 6 in. in diameter, so buy both size caps and return the unused one. You’ll also need three hex-head or Phillips self-drilling 1-in. sheet metal screws and a drill and bit.
Here with the step to replace a rain cap on your roof.
1. Accessing the roof
Position an extension ladder at the edge of the roof in line with the rain cap that will be replaced. Extend the upper portion of the ladder so the top rung is at least 24 inches above the edge of the roof. Then, access the roof with careful manner.
2. Loosening screws
Using the appropriate screwdriver or nut driver, loosen and remove the small sheet-metal screws that secure the base of the cap to the riser.
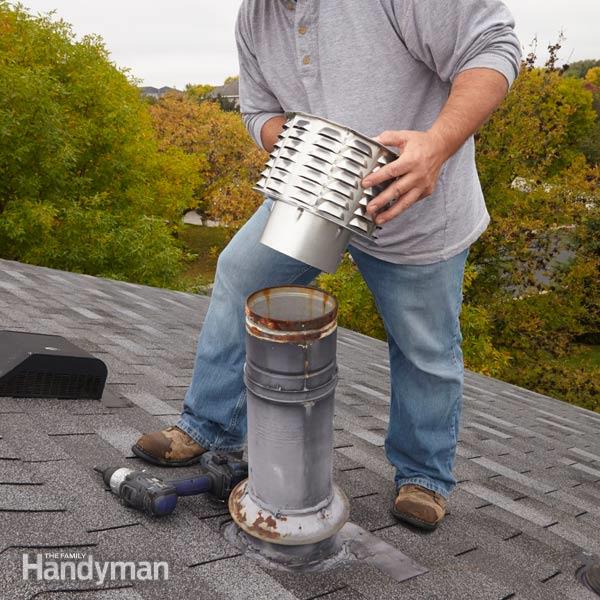
3. Cap Removal
Grip the cap with both hands and attempt to rotate it loose from the top of the riser. If the cap is frozen in place, hold a wooden block under one side of the cap and hit the opposite end of the block with a hammer to dislodge it. Then, remove the cap from the top of the riser.
4. Measuring the cap
Measure across the open end of the riser to determine the size of the base on the replacement cap is next step. Specify the type of riser, such as one for an exhaust fan or water heater vent, when obtaining the replacement.
5. Fitting the base
Fit the base of the new cap onto the top of the riser. Grip the sides and rotate it as you push downward until it’s fully fitted onto the riser.
6. Installation of new cap
Open the package of self-starting sheet-metal screws that came with the new cap. Drive the self-starting screws, evenly spaced, around the base of the cap and into the outer wall of the riser, using a cordless drill with a screw-tip attachment.
To do the repair, some tools that will be needed namely as follows.
• Extension ladder
• Work gloves
• Screwdriver or nut driver
• Wooden block
• Hammer
• Measuring tape
• Replacement cap
• Cordless drill with screw-tip attachment
Some tips executing the cap replacement is consulting an air-conditioning contractor regarding other procedures to dislodge a cap that’s corroded and frozen to the riser.
It also needs to remember while doing the job, exercise extreme caution when working near power lines on a roof. If necessary, enlist a professional to replace the cap if power lines are too close to the work area. In addition to that, wear work gloves when removing sheet-metal screws and removing the old cap.